Friday 30 March 2012

Bunny Project : Completed

Here is the finished picture of the Bunny Project, in time for Easter.
Follow the above link to go to the step by step procedure on this project.

My advance Easter wishes to all my lovely readers.......


Of course , Spring has arrived !!!!!


I have worked all the petals , leaves and flower center with Granito stitch.
Flower petals : 8-stitch granito
Flower center : 6-stitch granito 
Leaves : 6- stitch granito
Stem : Stem stitch 

Tuesday 27 March 2012

Free Embroidery Pattern : Shadow work

If you wish to practice Shadow embroidery and are looking for a simple design, this one is for you. This design can be used as single motif on handkerchief or as repeating designs.


Tip: 
Use SINGLE strand of thread and SHORT back stitches or double back stitches if working shadow embroidery with this.

If you need a HOW- TO Shadow embroider on this design please feel free to ask me , just post a comment here.

Happy Stitching!!!!!!!!


Monday 26 March 2012

The Bunny Project: Feet


Find links to all the posts related to this project here


5. Feet :

The feet of the bunny are outlined first in back stitch and then darning thread across these back stitches on the back of the work.

Back stitch started.


Feet outlined using back stitch.


Weaving of thread across the stitches on the back side of the work.
The knot that is seen is the starting knot of back stitch.


Darning / Weaving completed. Check the picture below to find the direction of stitches used .

The first stitch anchors on the few herringbone stitches of the body and then follows the direction as marked.
I felt the weaving was too little owing to the longer length of the stitches on the front. This was mainly due to the kind of fabric I used.


I took an extra step to weave in the opposite direction too. This is totally a optional step and can be omitted also because the work looks perfect even without this. Overcrowding stitches should be avoided here as the area is small.


I completed the work and Ironed it. It does look great.
The Easter bunny is getting ready!!!!


Back side of the work looks like this.


Happy Stitching!!!

Wednesday 21 March 2012

The Bunny Project: Body

Find links to all the posts related to this project here


Note: 


  • The fabric used for the tutorial (only) is a tightly woven fabric used to get clear close up pictures, and not the one used for original project.
  • I am using black color thread instead of the brown thread that is supposed to be used in this project, just to show the steps clearly.
  • Keep the fabric really taut on the embroidery frame.
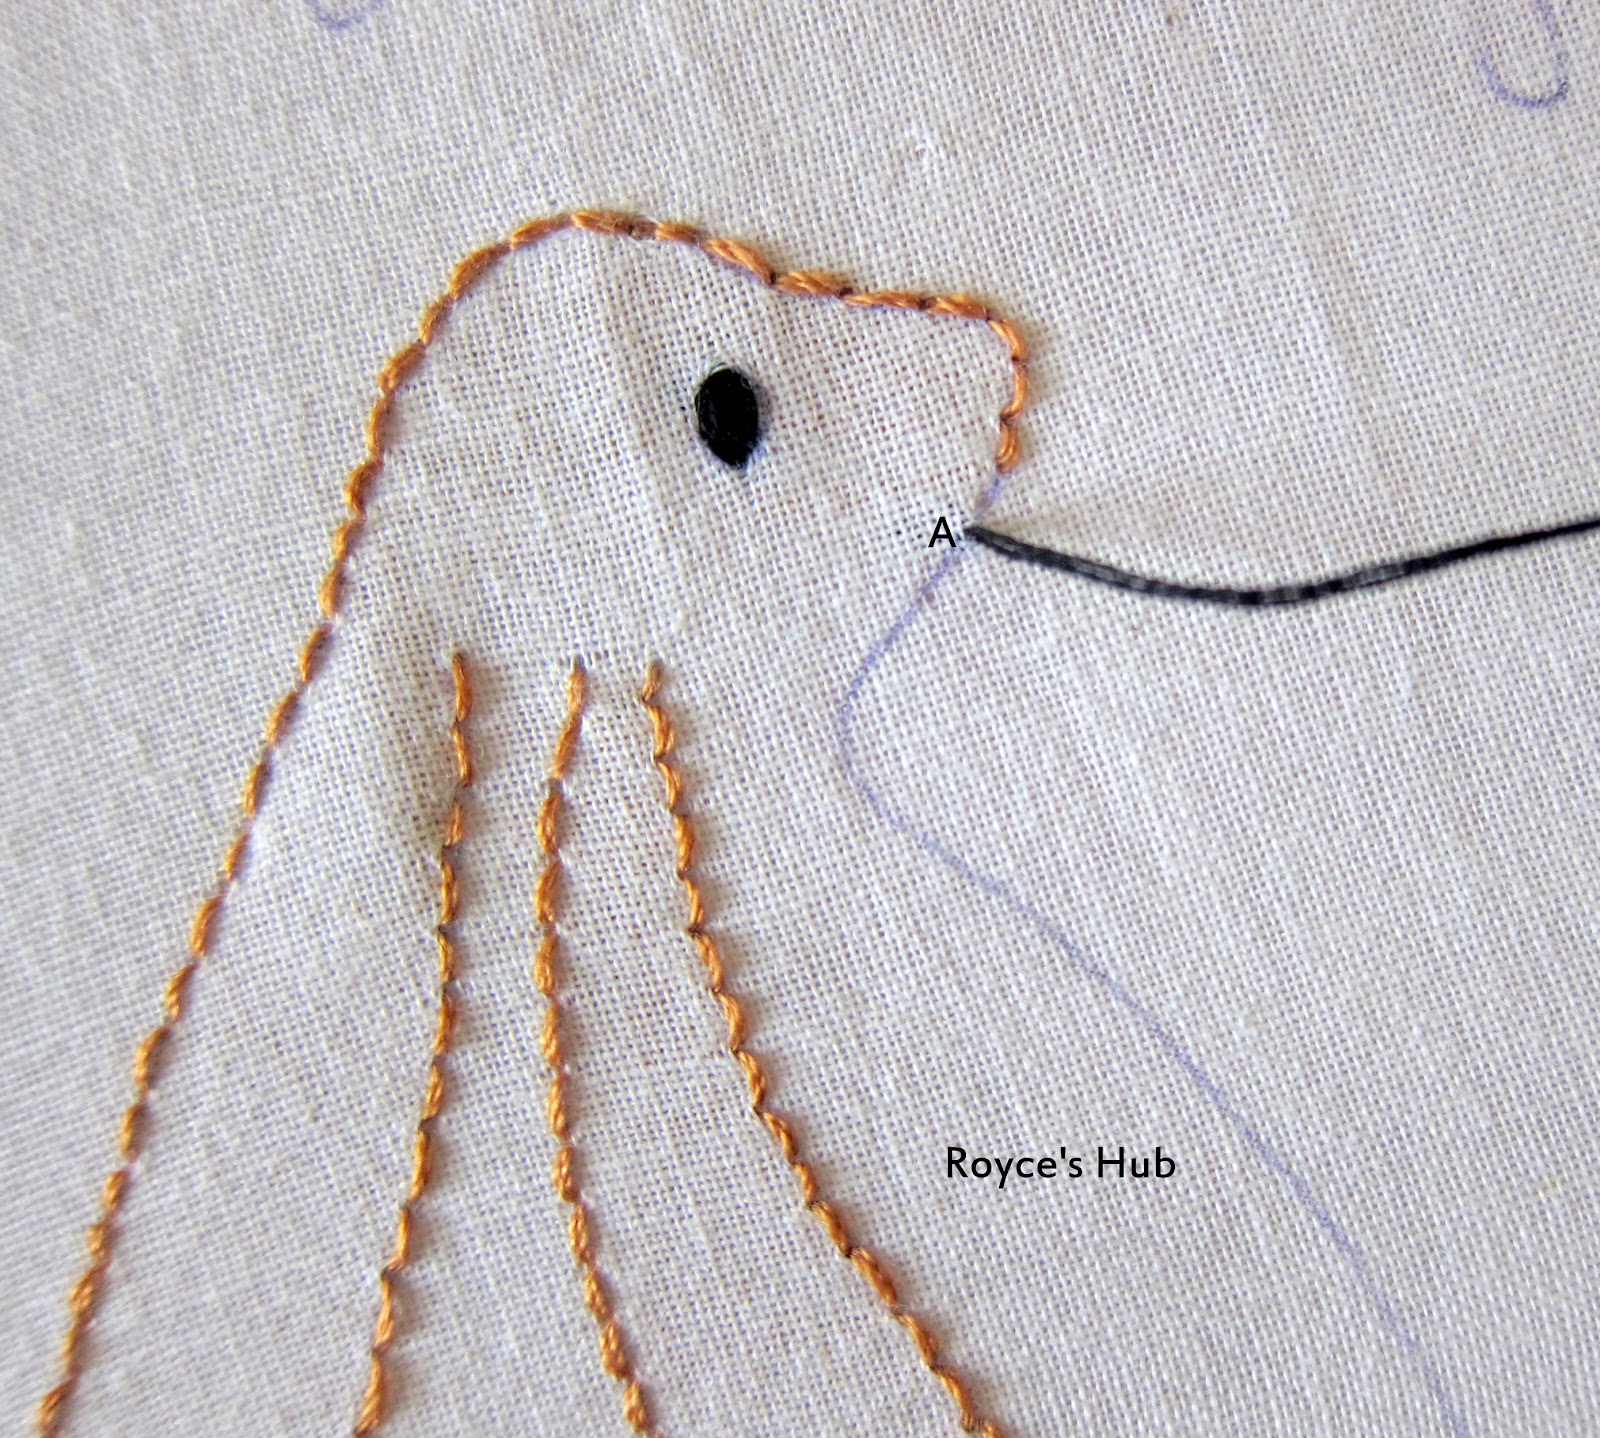
4. Body:

The stitches here have to be made into the same holes as previous ones on one side where the border is already stitched 

Bring the starting thread out at A.


Go down at B


The view of back of the fabric when the needle passes at C ( the needle has to pass through the same hole of the stitch made in the previous section). 

D is the next point of insertion from the front side, as shown in the next picture.


Please note that the needle passes through the same hole of the previous stitch.


Next the needle comes out at E. Thus , continuing with the reverse herring bone stitch.


Please note that I have got only one stitch on the outer border of the left ear before the inner border appears. This may vary and more stitches may be available on the outer border depending on the slant given while working the face. 

Here , I begin working on the inner border of the left ear using the reverse herringbone stitch.


Work over the ear till the body is reached, when stitching is continued over the body.
Continue in the same manner till the end , stitching over the tail on the back side to finish. 


Here is the original finished work.


and the back side looks like this...

You can see that the stitches of the body have been made over one ear and half of the tail.

Happy Stitching !!

Sunday 11 March 2012

The Bunny Project: Ears and Face

Find links to all the posts related to this project here


3. Ears and Face:


Right Ear :

Note: 
The fabric used for the tutorial (only) is a tightly woven fabric used to get clear close up pictures, and not the one used for original project ( as shown above)


Continue in a similar way till the top of the ear

Finish off and weave the thread into the back side of the work.

Left Ear:


At the point where the ear ends , the reverse herringbone stitch should be extended on to the face .


Stitching  should be continued to the top of the head.


At this point the back of the design is already filled with herringbone stitch, where as, the front needs to stitched ( as seen in the above picture).


I stitched the front using only back stitch instead of reverse herringbone , so as to avoid crowding at the back of the fabric, as the back of the design was already filled.


 The finished work.


Happy Stitching

Saturday 3 March 2012

The Bunny Project : Stitching The Tail

Find links to all the posts related to this project here

You are welcome to join me if you want to stitch along .

Next in line is Bunny's Tail.

2. The tail :


I have selected a dark brown color to stitch the tail.

The circular tail is stitched using Reverse herring bone stitch to give the shadow appearance.

I am posting all the steps in pictures below.

The thread used here is for illustrative purposes only . I am using 2 strands of DMC 6 strands thread for The Bunny Project

First one half of the circle is filled and then the next half .
So, we start in the center and work towards the sides.


Now , we start the Reverse Herringbone or the Double back stitch on the right side of the fabric 


The last stitch of one half of the circle


One half has been stitched using Shadow Embroidery


Starting the second half


Continue stitching in the similar way as the first half


The last stitch of the second half


The Shadow work completed on the circle


Back side of the work/ fabriC.
Weave the loose into the stitches on wrong side so as to avoid the loose end being visible from the front.


 The tail of the bunny is now finished


Happy Stitching.